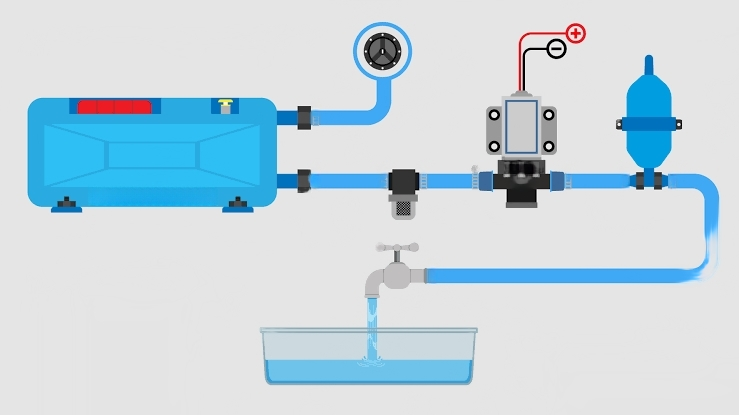
Understand the plumbing system on your recreational vehicle (RV) so you can know how to install RV hookups on the property while you are traveling to remote locations since you may not always be able to access help and supplies.
You also need to understand basic troubleshooting for existing problems that are specific to your RV and other common problems that occur with basic plumbing systems. While the RV plumbing system is quite similar to a home model, check the functioning of every component to avoid running out of hot water.
The RV plumbing system uses an external water source that can be connected to an internal tank to pump water to the showers, washrooms, and sinks. So, enhance your water pump capabilities to enjoy hot showers on your camping trip.
Use potable water and functioning equipment to build an energy-efficient and convenient plumbing system. Read further to understand plumbing basics and suitable equipment, find problems to fix or replace parts if needed, and enjoy your road trip easily.
Basics and Essential Parts of RV Hookups
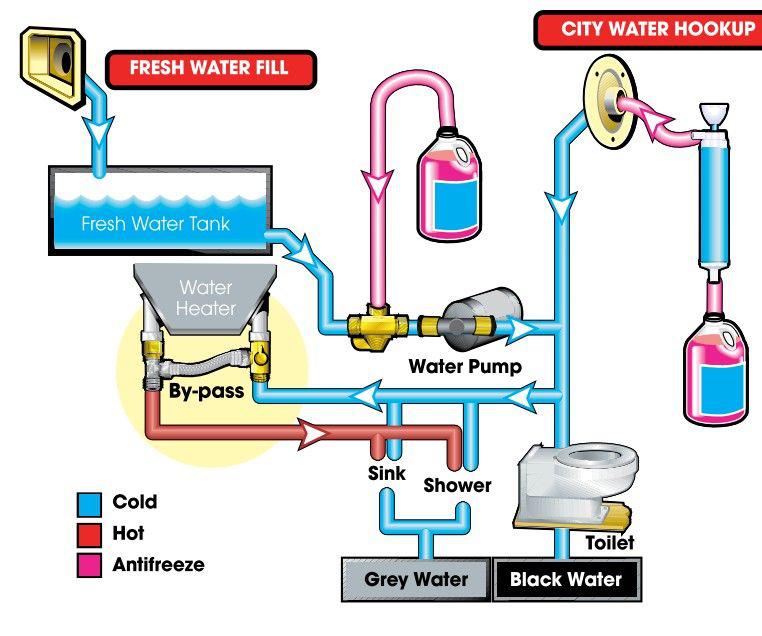
Connect your RV to a city water outlet to mimic domestic plumbing. However, for times when you are traveling to a remote location, you can store a finite amount of liquid and replenish it whenever necessary. All you need to do is ensure that the plumbing system has all the accessories to access and disperse potable water according to your requirements.
For a clean, convenient, and comfortable trip, equip your RV with the following parts and accessories:
- Water pump: Used to pressurize the plumbing system.
- Water heater: Enjoy hot showers using a powered 120V switch.
- Fixtures: Faucets, sink and fittings, pipe connectors, shower heads, and drain covers similar to household attachments.
- Washroom plumbing: Also known as a black water tank or wastewater that needs to be emptied into a sewer.
You can also use a water pressure regulator, a backup gray tank to empty waste, and a plumbing system that can be accessed from the inside and outside.
Similarities and Differences: RV Hookups
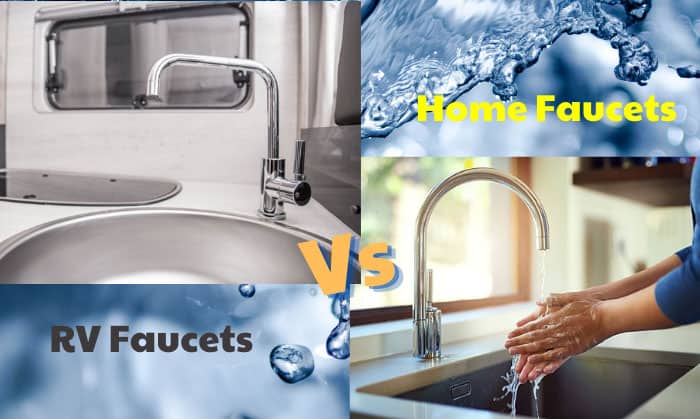
Regarding similarities, the RV plumbing system has the same copper or plastic pipe fixtures as your homes. At times, you can also swap your home adapters to the RV for emergencies.
The plumbing connection is fairly similar, too. However, you need to be mindful of the tiny diameter tubes and connectors since the residential ones are large for input tubing. Alternatively, you can also use a straight connector to fix the input hose with some sealant and tape.
The difference is the flexible tubing, access to multiple water sources, and smaller and compact fixtures to fit the confined space.
Differences Between RV Plumbing & House Plumbing
1. Water Sources
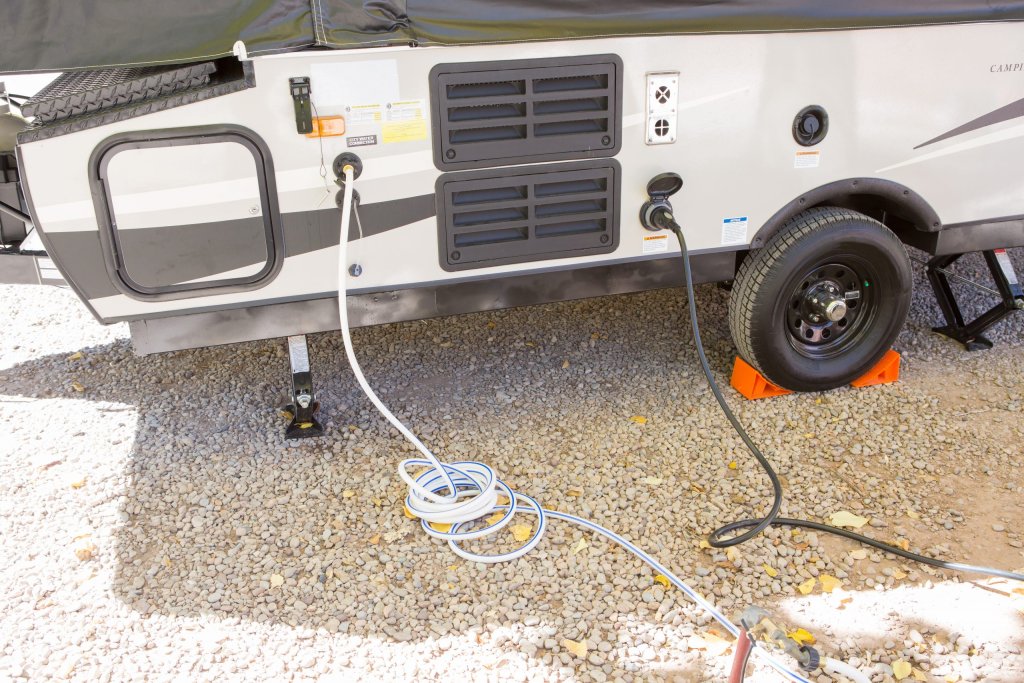
Whether you are at home or traveling, a smooth water supply is extremely essential. Depending on your usage, ensure the onboard tank can store enough water until you reach a freshwater resource like streams, lakes, and rivers in remote locations. Fix good water filters to avoid debris or other particles that contaminate water, and use an efficient pump to draw potable water.
Besides water for cooking, cleaning, and other purposes, on-demand hot water for bathing is essential. The RV plumbing system includes a 4-to-16-gallon water heater running electrically or on propane gas with an internal switch to provide hot water within minutes. You can also use a tankless system that uses a heat exchanger to supply hot water continuously.
2. Waste System
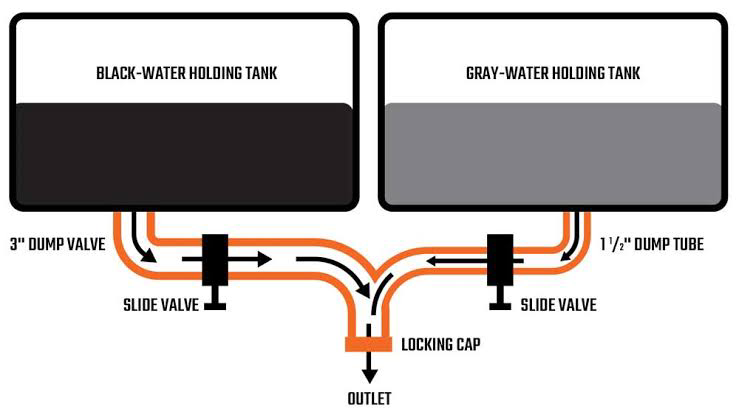
You need to empty the gray and black wastewater without disrupting safety protocols. Instead of a lake or river, find a dump station or septic tank to process waste. For black water, ensure the dump station can process toilet waste and maintain it to prevent unpleasant conditions.
You can use a sewer hose to connect the vehicle to a sewer, equip durable drainage tubes, and fix valves to regulate wastewater flow. Additionally, you can use a cleanout fitting to clear blockages and ensure all components function correctly.
3. Maintenance and Repairing
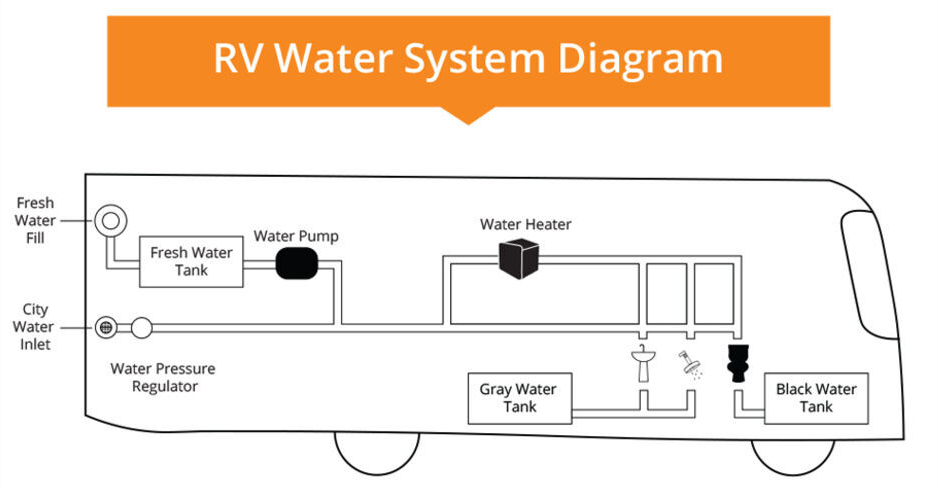
Similar to home plumbing, you need to maintain RV fixtures at regular intervals. These tasks include checking the pipes for leaks and signs of corrosion. Along with cleaning all tubes and attachments for efficient functioning, you can peruse the system diagram to check connections and identify potential problems.
However, when you are on the road, you need to know a little more about fixing and replacing essential parts since not many plumbers make RV house calls. You need to keep different fixtures, adapters, valves, and a set of quick-connect fittings that are inexpensive. However, remember to do so without plastic fixtures since they do not last long and crack under harsh weather conditions.
Final Thoughts
Perform routine maintenance and troubleshooting to keep your RV plumbing system in perfect condition and ensure you do not have to worry about inconvenience or added expenses later. Luckily, you do not have to be an expert plumber to maintain your camper, check all fixtures, and repair/replace them if needed.
For an added comfortable experience, sanitize water before consumption and keep the plumbing system in optimal condition. If you are worried about running out of water, plan to conserve water before you reach the next water resource.
Protect your RV plumbing system damage caused by freezing temperatures by draining water before winter and when you are not planning to travel within the next few months. If you find it difficult to find fixtures to replace the RV components, use adapters from your residential settings since the house and camper plumbing system is pretty similar.
